Saturday, 31 December 2011

Mum's Guide - Cooking for Toddlers - Must have's to make your life easy!

Getting started

Today I would like to share some little tips when cooking for baby's & kids.


I usually cook for a few days in advance because sometimes I am not as hungry, some days I eat in the evening with my husband or some days we just eat something which is simply not yet for our little one due to spices or the lack of a full set of teeth. The little one however needs lunch and proper nutrition and with some easy tricks it is quickly prepared.

Always handy to have are

· Some little Tupperware storage boxes for freezing or storing for the next 3 days.
It can also be a no-name brand from your local supermarket. If I have cooked more or for anything we don’t eat in the next 3 days, freezing it in the relevant portion your child is able to eat comes handy. The portion then just needs to be defrosted by putting it into the fridge a day before consumption.

· A Blender = a Mums lifesaver!
My old one gave up on me a few weeks ago so I got one from Kenwood with 3 blades. It’s a fantastic product; I love it and couldn’t live without it. Even though my boy can chew already most of the things its handy to have for making fruit-puree which he can eat either pure or you add it to semolina or rice-pudding to give it a little vitamin-lift. And if you don’t need it for baby food, well its always good to have for making a creamy soup, marmalade / jams or even part-blend salsa-dips or relishes to have a 50:50 chunky yet creamy consistency.

PS: If your child is a bit bigger and does not "love" i.e. vegetables in particular, a blender is quite handy to cover-up the healthy veggies by mixing them with the tomatoesauce in order to get the vitamins into your child.

· A Pressure-Cooker or Steamer.
As I am German I am using usually either WMF or Silit however any other brand will do. They come in different sizes depending on size of family or what you plan to cook. Don’t be afraid of any stories you might have heard regarding the pot exploding etc. These days that is very unlikely to happen. If the food is not ready or hasn’t cooled down yet enough it is not possible to open the lid except you use extremely strong force or leave the pot boiling unattended for a long while - which are both things you should never do anyways; with or without kids.

Be careful though when making fruits for compote… I once had apple mash all over my hub because I filled too much into the pot - so always follow the instructions (RTFM as they say ;)) ...

A Pressure-Cooker is SO handy for making stews, soups or even a roast and it’s quick and easy. Not to mention that you safe a lot of time and electricity (as it is faster cooked due to the pressure) which makes the investment also environmentally friendly ;)

At the end of the day no matter if a working or full-time stay-at-home Mum, we all still have our own lives and need some rest and every little help to make things easier is greatly appreciated, don't you think so too?

Wednesday, 28 December 2011

Cake with Apples & Almonds


Our little Apple tree had surprisingly lots of apples this autumn. Aside of many jars of apple puree for our Toddler we had enough apples left for some cakes. See what I did the other Sunday.

Ingredients:


For the base:
300g flour
200g butter
100g sugar

For the topping:
2 eggs
100g sugar
2 EL Vanilla sugar
3 big + 2 medium sized apples
100g grounded almonds
150g flaked almonds
2 spoons of butter

Mix the flour, butter and sugar with a dough hook to a base. Mix until the dough looks like you can form it with your hands and put it into the fridge for about 30 Minutes.

Grease a baking form and sprinkle breadcrumbs into it. I used a Ø24cm baking form however think 26cm are better otherwise your base is a bit too thick. Use the dough to pull sides up inside the form, so the topping cannot run out.

Separate the eggs and whisk the egg yolks with a bit of water and the sugar until everything is foamy. Add the vanilla sugar and keep stirring until dissolved.

My Tip: I don’t like the vanilla sugar that much you can buy (tastes quite artificial for my taste buds) so I make vanilla sugar myself:

Simply add 2 Vanilla pods into a plasti container (Tupperware) and add sugar on top. It stays fresh for quite a long time. From time to time add sugar or replace the Vanilla pods if you have the feeling they don’t give away any flavour anymore or fill into a different container if you have to wash the one us use once in a while :) easy, peasy and tastes much better!
 
Grate the 3 big apples roughly and stir with the ground and flaked Almonds into the egg-yolk-mass.
Whisk the egg whites until stiff and lift them carefully under the topping mass. Be very carefully and don’t mix too briskly or the egg white will dissolve and the topping will not be as fluffy.


As decoration I peeled 2 smaller apples, removed the core and cut the apples then into thin slices. Put them on top of the cake. Heat the butter just a little bit in the microwave to have it all liquid and paste over the cake topping. 


Then put the cake into the oven and bake for about 40-50 Minutes at 160°C (320°F). 

If you see that the apples on top are getting a bit too dark, simply cover them with a sheet of baking paper.


This cake is perfect for a little afternoon break. You can eat it also with custard or whipped cream… delicious.

Thursday, 22 December 2011

Pat’s Christmas-Cheesecake


The other day my little family and I have been to IKEA Dublin and we as usual couldn’t resist their lovely cuisine. 

As we have quite a sweet tooth we never miss out on their dessert section where they had a "Christmas-Style Cheesecake" displayed. 

Well, unfortunately their recipe was based on Christmas-Pudding, means there were Raisins in the cake and I simply detest raisins! I love food in all shapes, forms and flavours but raisins are one of the few things one can see me run.

I had however a bright idea to make this IKEA dessert my own. I changed and tweaked my recipe of the traditional Cheesecake and simply named it 

"Pat's Christmas-Cheesecake"

Ingredients:

ca 200g Cookies
1/2 teaspoon Cinnamon
75 Butter
500g Natural yogurt
50g Cream
2 1/2 German Gingerbreads with Chocolate coating
50g Sugar
1 packet of ground Gelatine

German "Lebkuchen" I got in LIDL Ireland
Smash the Cookies with a roller pin in a plastic bag. Be careful and don’t smash too hard – if the bag bursts…. It’s quite a mess lets say. Once the cookies are not recognizable as such anymore, add the crumbs into a bowl and mix it through with the Cinnamon.

German "Lebkuchen" - nothing beats this flavour :)
Melt the Butter in the Microwave and mix thoroughly with the cookie-cinnamon-crumbs. Stomp the crumbs into a spring form you have placed on a nice little plate.

Mix the Chocó-Gingerbreads with your mixer until you have only crumbs left. 

Add Yogurt, Cream and Sugar into a different bowl and mix it through with a blender until you have a fine, soft consistency. Add the Gingerbread crumbs and give it another blend.

Gingerbread Crumbs
To dissolve the Gelatine I boil water in a kettle, put a little bit in a coffee-cup and add the ground Gelatine on top. Stir briskly with a little fork so you don’t have any lumpy Gelatine-Bits left. Add a few Spoons of the Yogurt-Mix to cool the Gelatine down and keep stirring to cool it down a bit more.

Add the Gelatine to the Yogurt-Gingerbread-Mix and mix again with the blender.
The Cheesecake-Topping
Leave the Mix sitting in the Bowl for a little while – not too long, just long enough so the Mix can settle and is not too liquid anymore. This prevents the Cheesecake-Topping to eventually “run away” under the spring-form.

Carry the whole setting (plate + spring form + cheesecake) into your fridge and leave it there for minimum 4 hours – best is overnight.

Serve it with a scoop of Vanilla- or Chocolate-Ice-cream or with whipped cream, as per your liking.


Enjoy and have a very happy Christmas
 

Wednesday, 21 December 2011

Irish Strawberry Cheesecake – the VERY easy recipe

To make this yummy cheesecake you will need the following ingredients:

About 200g Cookies
(they have to be easy to crumble i.e. shortbread or oatmeal-cookies or anything else you like)
80g Butter
500g Soft Cheese
(You can use any Soft Cheese, plain and without herbs of course. I preferably use Greek yoghurt because I think it tastes more like SummerJ)
150g Cream
80g Sugar
3 leaves of white Gelatine (you can also use 1 Pack of the grounded Gelatine)
1 little bucket of fresh Strawberries (approx 500g)


At first put all the cookies into a little plastic bag and smash them with the Rolling pin. To make them very fine roll the last few bits so you have a nice crumbly consistency.


Put them into a bowl and add the Butter you have melted beforehand. This can be done in a pot on the cooker but it’s faster to melt it on a little and short setting in your microwave. Mush everything thoroughly or the base will be very crumbly and you can barely get the cake on a plate when serving.

Put a springform tin on a plate and stomp the cookie-mash in. Put into the fridge while you start making the most important part: the topping.

Wash the Strawberries thoroughly, cut into half and put into a high jug. Then comes my favourite kitchen tool into place: the blender!

Mix the strawberries until you have a smooth fruit purée.

Put the fruit purée aside and start with the cheese mix: Mix Soft Cheese (or Yoghurt), Sugar and Cream until the Sugar has dissolved. Then add the fruit purée.

My Tip: If you wish you can put a bit of purée directly on the cookie base which I did (see picture).

Boil the kettle and put a little bit of hot water into a jug or little bowl.


Then add the Gelatine and whisk sturdy in order to avoid any lumpy bits. Keep stirring the mix until it cools down a bit.

Add some of the cheese-fruit-mix in order to cool it down further. This will avoid any gelatine bits in your cheesecake… not nice to chew on, believe me.

Then add the gelatine mix into the cheesecake-topping and keep mixing it again with the blender.

My Tip: Wait until the gelatine has hardened the topping a bit so you avoid any “leaking” when you add the topping on the base.


Put into the fridge until the topping has hardened. This should last minimum 4 hours, best is overnight.


I hope you like the recipe and find it as easy to do as I promised. 

Soon I will do a Bailey’s Cheesecake so stay tuned dear Readers ;)

Monday, 19 December 2011

Spicy Muffins "La Chicka"


I am invited to a Baby-Shower today and am bringing some spicy muffins for the ladies. My husband has already tested the muffins and gave his approval... of course you cannot offer a new creation without sampling it ;)

I have used the following ingredients:

120ml Plant oil (Sunflower or whatever you prefer. I used Rapeseed oil = rich in Omega 3+6 = good for you)
2 Onions
3 spring onions
1 little red hot Chilli (fresh or dried from your summer garden)
1 Chicken filet
1 teaspoon ground Paprika
270g flour
3 1/2 teaspoon baking powder
2 large eggs
1 spoon lemon juice
125g sour cream
125g natural yogurt
Salt & Pepper


Heat up a little bit of oil in a frying pan and fry the finely chopped onions. Add the chopped Chicken cubes and the very finely chopped Chilly and keep frying until the Chicken has a nice brown-golden colour. Add the spring onions and turn the hub off. They can fry with the rest heat = energy saving = money saving.

Mix the flour and the baking powder in a separate bowl.
Whisk the eggs, oil, lemon juice, sour cream and yogurt until you have a nice and creamy consistency. Add Salt and Pepper, then the flour-mix and keep whisking until you have a nice creamy dough.

Add the content of your frying pan (Chicken & Co.) and briskly stir with a spoon.

Take your Muffin forms and put your little cute Muffin papers in the relevant spacing. Fill the dough into the little paper forms. Make sure you only fill them about 2/3 with dough as your dough will rise during baking.


In the oven with your forms and bake them for 20 Minutes at 190°C / 374°F.

You can eat the spicy “La Chicka”-Muffins hot or cold.

Guten Appetit and have fun trying this recipe for youself :)

Baked Berry Cheesecake (without flour / with semolina)

This year I was faster than the birds (hahaaaa) and managed to get at least a handful of sour-cherries from our tree. I just love the sourly-sweet contrast in a cake. We planted the tree when moving into our house and by now he is big enough and produces enough fruit for a cake – hooray!

So I was experimenting again and see what recipe I came up with:

Its again easy and quick again – I love those recipes: it looks like a big effort when in fact it isn’t and you have enough time left for your Toddler / husband or anything else.

The ingredients I used were as follows:

Breadcrumbs
4 eggs
80g Butter
750g Greek Yoghurt
5 Spoons (Soupspoons) of semolina
75g sugar
1 teaspoon baking powder
300g berries – whatever you have, cherry’s / raspberries / redcurrant or mixed berries

As most ovens are very quick these days I don’t preheat the oven! It saves you energy and cuts down your electricity bill. Always think environmental friendly :)

My little antique helper :)
If you have fresh cherry’s make sure to get the stones out first before you start making the batter. There are quite handy devices out there – I inherited a quite antique one from my Granny which is handy if you only have a little amount of fruits.

Then we get straight into getting greasy: grease a medium sized spring-form with a little bit of butter and sprinkle the breadcrumbs generously into the greased cake pan.
Separate the eggs: egg white in one – egg yolk in another bowl.

Add butter to the bowl with the egg yolks and beat until everything is soft. Add yoghurt, semolina, sugar and baking powder and keep mixing until you have a smooth consistency.

Then whisk the egg whites until they are stiff and carefully fold them into the batter (picture 2)). Make sure not to stir, but slightly cover the stiff egg white with the batter once everything is mixed well throughout.

Pour everything into the greased spring form (picture 3)) and sprinkle the berries on top of it (picture 4)).

Bake it in the oven for about 50 Minutes to 1 hour at 200°C (that’s 400°F if I am not mistaken). If the cake is getting too brown just cover it with a bit of parchment paper. Check after approximately 50 Min with a wooden toothpick if the dough is cooked. If anything is sticking to the pick – leave it in for another little bit (picture 5)).

Remove the cake from the oven and leave to cool. Once cooled, turn the cake pan over onto a cake plate and dust the cake with icing sugar (picture 6)). Ready!


If you wish you can decorate the slices with fresh fruit and serve whipped cream with it.

Guten Appetit :D

Creamy Dessert for Toddlers & Kids

Puree with Banana & Strawberries

Sometimes it is not easy to get fruits and vitamins into out little ones. Escpecially in the winter season this is important in order to strengthen the immunesystem - no only for your child. Here is a quick and easy trick for a nice dessert that is tasteful for all.

1 banana -> peel it and break it into bits
A handful of strawberries -> wash thoroughly and cut into halves.

Blend it all together until you have a smooth consistency - Ready :)

Using the banana gives the purée a nice consistency so the dessert is not as runny as if you would mix several “watery” fruits together. Also Banana adds natural sweetness to a maybe more “sour” fruit like a strawberry which is a complete new taste exprience for little tastebuds.

Also I use Banana as a sweetener because recent studies have shown that it is not recommended to sweeten your toddlers dish with honey unless it is 2 years of age. So in this case the banana is the healthy alternative.

Not to mention that sugar is not recommended for Toddlers anyways and believe me, they will get to the sweets counter early enough ;)

If you wish you can add some natural yogurt to the puree as well, so you have the perfect blend of vitamins and calcium your child needs for growing.

Store any leftovers or whatever you don't consume immediately by using Tupperware or any other containers you have. If the container is airtight (round) you wont loose any vitamins.

Spinachpesto - not only for Popeye!

Check out this easy recipe for Spinachpesto, your Toddler will eat it all!

Today I was thinking of what I could cook for my little fella. Wandering through our polytunnel I saw the Spinach being ready for harvesting. Why not, off it goes and I already had an Idea walking back to the house. Here it goes:

Ingredients:

A full pot of Spinach including the stems
A spoon of butter
½ onion
1 clove of garlic
¼ of a teaspoon of salt
Ca. 50ml cream
Parmesan cheese – as much as you like

Cover the base of a pot with just a bit of water and add the Spinach. Simmer on a little flame until the veg is through. You will see that easily: the pot is not as full anymore as when you added the Spinach – only the base is covered now and the leaves and stems are soft.


Mix everything with the blender until you have a fine, smooth consistency … it doesn’t look the nicest I have to admit but bear with me :)

Melt the butter in a different pot and add the finely chopped onion until it is glassy and soft. Then add the blended spinach.

Chop the garlic very fine or use a garlic crusher and add this to the paste with the little bit of salt. You really don’t need much.

Then add the cream. Bit by bit so it is a nice creamy consistency. The mash looks now actually a bit nicer you will probably admit, it reminded me of Guacamole.

I had boiled noodles and added the Spinachpesto. Grate some fresh Parmesan on top of it – ready. And it’s so easy, fresh and healthy.

My boy ate the full portion and even nibbled a bit from mine.


Did you know: you can grow Spinach easily on a long planting pot on your balcony?


And if you don't have fresh spinach you can also use frozen one you got from your supermarket.

Noodles with herbal soft-cheese-sauce

Today I would like to share a quick-fix recipe with you because at times it just has to go quick and you don’t have much time on your hands.

This recipe I created just a few days before our summer holiday, using the last few ingredients I could find in the house.
So I found:
  • Noodles (always have them in house)
  • A little bit of Oil (Sunflower, Olive oil... what u would usually use)
  • 1 clove of garlic
  • 1/2 Pack soft cheese

  • a bit of Milk
  • a bunch parsley (or frozen / harvested from your summer garden)
  • a little bit of tomato puree
  • grated cheese (whatever you like and have in you fridge: it can be everything from Emmental, Gouda to Parmesan)
While cooking noodles in boiling water, I am preparing the sauce.

PS: there is no need to boil the noodles in salted water. First of all noodles usually already contain salt and secondly: we all consume way to much salt anyways and I don’t even want to go there explaining what that does to our health.

If you spice up your sauce with herbs you don’t need much salt – no one will taste the difference as a whole lot of different tastebuds are getting tickled :)


For the sauce just add a teaspoon of oil into a pot and heat it up. Add the finely chopped or crushed garlic and the tomato puree.

Then add the soft cheese. Regarding the amount of the soft cheese or the noodles please consider the amount of people cooking. I am usually cooking for 2,5 people = 2 adults and our little man. So if you cook for more, you can use the full pack of soft cheese which is approximately 250g.

In order to get the sauce nice and creamy add a bit of milk. Don’t add too much or the sauce will be too runny, however if you add less it might be a bit thick. Add bit by bit until you get the consistency to your liking.

Then add the parsley and simmer for a little bit so the flavours can unfold.

Garnish the noodles on the plate with the sauce and add the grated cheese on top ... tastes yummy and is also ideal for little Toddlers who just learn how to eat themselves.

Guten Appetit

Sunday, 18 December 2011

Christmas-Style Baked-Apple Dessert


For this lovely dessert you need the following ingredients:


4 big Apples
3 Soupspoons Sugar
50g grounded Almonds
50g chopped Walnuts
50g chopped Hazelnuts
2 Soupspoons Cranberry Sauce
300g Marzipan
2 Spoons Rum (or Rum-Flavour for baking)
3 Eggs
200g Cream
1 Spoon Vanilla sugar

Caramelized Sugar


Add the sugar into a bowl with a little bit of water and heat it until the sugar is caramelized (a little brown).
Nut-Mix
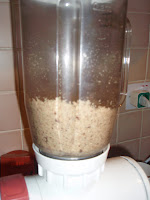
Add the 3 different Nuts and mix them thoroughly. Let the Nuts and Sugar cool down and blend them roughly in a Mixer. Don’t make it too smooth, you want to have some chewy bits left.


My little helper - VERY useful


Peel the apples, cut them into halves and cut out the apple core.


A special find on the Irish Farmers Market

Mix the Cranberries with 150g Marzipan, Rum and add the Nut-Caramel-Mix.


Spread a bit of butter in an ovenproof dish, fill the apple-halves with the Marzipan-Nut-dough and put them into the dish.

Separate the Eggs and whisk the egg white until stiff.

Put the egg yolks, 150g Marzipan, Cream and Vanilla sugar into a bowl and mix them with a blender.


Add the egg whites and mix everything very carefully so the egg white does not get too runny.


Pour the Marzipansauce over the filled apples and bake the whole dish for approximately 30 Minutes at 200°C / 392°F


If the top layer is getting too brown, just cover the dish with a bit of baking paper.


Ready – have a glass of mulled wine with it or a hot tea and enjoy yourself in front of a cosy fireplace. Simply wonderful!

You can eat this dish hot or cold, served with whipped cream or ice-cream... divine.


Total Pageviews

10,849