Sunday 15 April 2012

Tiramisu with Raspberries (no eggs)


Today I want to share my yummy summer dessert with you: Tiramisu with Raspberries.

No eggs are needed for this recipe so it is a nice dessert also for Toddlers and anyone with a sensitive stomach.

If you don’t have fresh fruits, you can also use frozen ones – simply brightens up your mood on a dull winter day.


For 4 glasses I used:

About 10 biscuit fingers
300g Raspberries
2 spoons Icing Sugar
1 cup Mascarpone (ca. 250g)
1 cup natural yogurt (250g)


Crush the biscuit in little bits and put them into drinking glasses or any other dessert servers you may have. I used whiskey glasses from Galway Crystal.


Blend the Raspberries and the icing sugar until smooth and add a layer onto the biscuit-bits.
Mix the Mascarpone and Yogurt with the blender in a different pot and add a layer of this mix onto the fruit-purée.

 
Then add again some broken biscuits etc... simply repeat the different layers until the glass is full.


I ended the layers with the fruit-purée and a little dot of Mascarpone-Yogurt-Mix on top….


.... and made a nice little pattern with a little dessert fork.

Put into the fridge overnight – at least for a few hours, so the biscuit can soak through and everything is nice and soft.


And then enjoy ..... hmmmm ... is it summer already?

Monday 9 April 2012

Fast & easy Fruit Dessert (or snack) for Toddlers

Banana and Peach

I usually always have fruits at home for us and the little one to nibble on. Some will be eaten just in its initial form or sliced, some I might make a lovely cake of and some I just blend together to make a nice little healthy fruit purée for my little one.

Although he can chew already a purée is always nice to have for adding a bit more taste to your semolina or rice pudding or just on its own as a snack.

For making this nice dessert you just need a blender and a high jug (to avoid spilling when blending).

1 banana -> peel it and break it in chunks
3 peaches -> wash them thoroughly and also cut into chunks. You don’t need to peel the peach, first of all the skin is quite healthy for the digestive systems and you don’t loose any vitamins and secondly: you are blending it, so the skin does no bother when chewing the fruity-yummy desert.

Mix everything together until smooth – here you go. Ready steady eat :)

It’s an easy “fast food” and again, if you have any Tupperware or other storage you have enough for the next 3 days and / or can freeze it into the sized pots you like. Make sure the storage is airtight (round Tupperware) so the purée does not loose vitamins by being exposed to air.

Enjoy and Guten Appetit.

Tuesday 3 April 2012

Who needs Jamie Oliver? Here is my easy meal for kids: The Higgledy-Piggledy Pot

Its sooo easy!


Here is an easy and simple way of using just what you have and still have a healthy meal for your kids. The basics like Rice, Noodles or Potatoes are usually in every household, combined with milk, tomato-sauce and some veggie and whatever you find in your fridge… *tataaa* here we have a proper dish.

I am only going shopping again tomorrow so I tell you what I did today for us. I even have enough for my boy alone for the next 3 days and some little pots leftover for the freezer to be eaten another day.

½ onion cut very fine and fry in
1 Spoon Rapeseed oil add then
2 slices bacon which you slice up very finely - bear in mind that depending on age your Toddler has not yet all his teeth and still swallows some bits wholly.

I checked our garden and found already:

3 medium sized carrots adding to the pot that fries on a low temperature
1 big potatoes chop in little cubes and add also
1 little zucchini/courgette which I will add a bit later because it will soften too much.

1 cup Rice Add to the mix in the pot with
2 cups Water (rule of thumb = 1 cup rice / 2 cups liquids)
Also I added 1 tomato (incl. skin + seeds) which is more for the consistency of the dish because it will fall apart anyway.
I cut a green pepper in fine slices and added them too.
I had also a bit of creamy soft cheese left with herbs + garlic. Again, this will dissolve in the sauce and will be absorbed by the rice and most of all adds more flavour to our little Higgledy-Piggledy Pot.

Now if you like you can add any herbs you might have. Either from your cupboard or maybe you grow them fresh in your garden or on your balcony. I added a bit of fresh Thyme and only a minute bit of Salt. Just ½ a teaspoon. Bear in mind that your Toddler does not need much salt. And having bacon in the dish is already a quite salty ingredient.

Until the Rice is soft it usually takes 20 Minutes on a lower setting. Don’t use too much temperature or the bottom will burn to the base of the pot. If the consistency is too sticky, add more water or milk to make it creamier for your child. They tend not too like it too much if it is too dry.

Note: you can use Noodles instead of Rice, organic noodles or just potatoes. Have a look around what you have and use it.
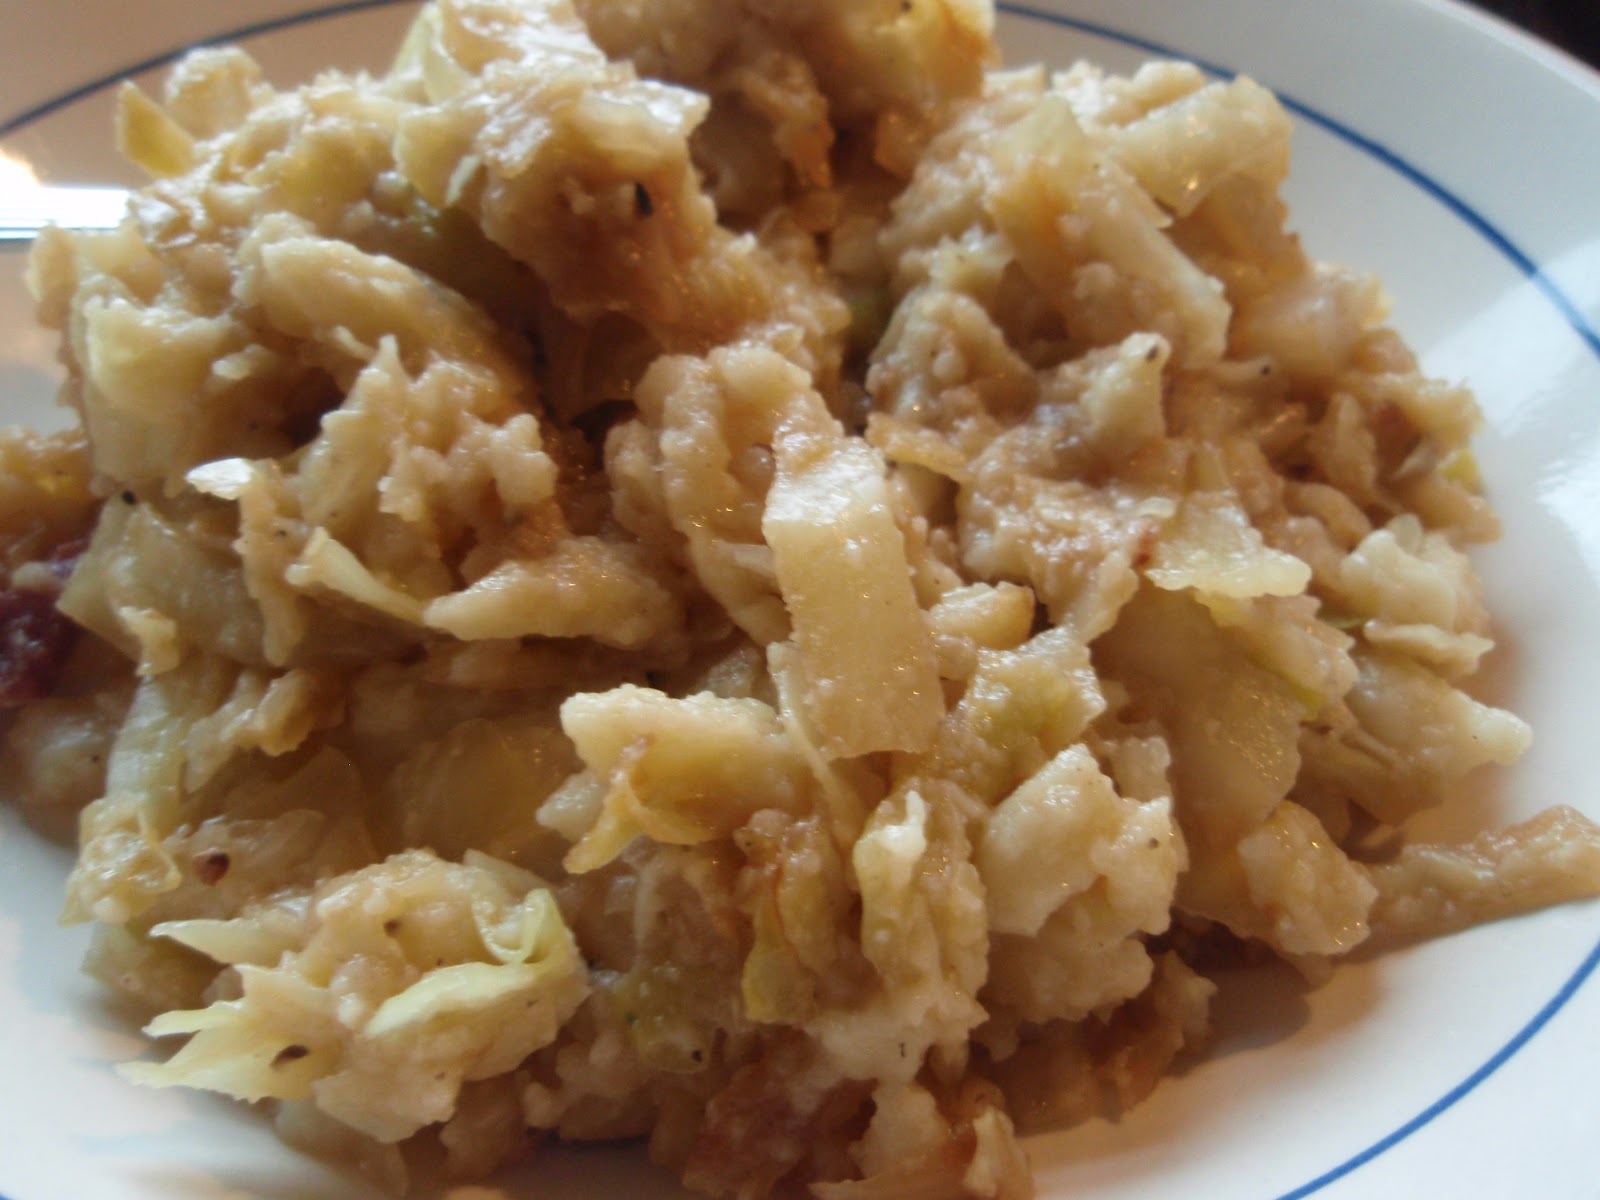
So you see: cooking is not witchcraft or science.
Be experimental, have fun with it without using complicated cooking books from fancy chefs around the world. Its soo easy, the time you wait for your fast food to arrive – the meal is ready. And you have an economic way of using simply what you have for a healthy nutritious meal.

Saturday 10 March 2012

Birthday cake for kids – our 2nd Birthday


For the birthday of our little man recently we had a big celebration with family & friends. I tried to do a “healthy” cake so I made a Choco-Biscuit with fruity Raspberry-Banana-Filling.


Here are the ingredients for the cake:

Mix 6 egg yolks with
4 Spoons of Cocoa powder
100g sugar and
1 spoon Lemon juice

until the sugar has dissolved and the cream has a quite foamy consistency.
 
Whisk 6 egg white until they are very stiff and add them to the egg yolk-mix.

Stir veeeery careful

Sieve 150g flour on top of it and stir very, very carefully.
The egg white should still stay stiff although it is stirred with the other ingredients. So you can guarantee a nice and fluffy Biscuit dough.

Add the dough onto a backing tray and flatten it with a spoon.

Closeup Choco Biscuit...yummy
My Tip:   
ALWAYS use baking paper when you bake biscuit. Never grease the form you put the dough into. So the dough stays nice light and airy and is “rising” to its best performance :)


Bake the cake in a fan assisted oven for about 20-30 Minutes at 160°C. Then let it cool out.


Went quite well....
... and I didn't even use a draft for it
Once the dough is cooled, cut the cake in to any shape you wish: 

that ranges from digits to animals, hobby related objects (football, tennis rack etc) or you can try to make your own Hello Kitty head. 

Let your creativity free range.


Then I prepared the filling. For that I used:

2 Bananas
250g Raspberries
500g greek Yogurt
1 packet ground Gelatine
3 spoons Vanillasugar

Mix all ingredients (except Gelatine) with a blender. Prepare the Gelatine according to the info on the package, let it cool down a little bit and blend it into the fruity mix. Then put it in the fridge, so the fruit mix is getting hard – best overnight.

 
Cut the 2 into half and add the fruity-yogurt-mix onto the cake. 

Then decorate the cake as you wish. I added icing-sugar and a few blue sprinkles.
 

Happy Birthday little Man :)


Wednesday 7 March 2012

Veggie-Turkey-Dish for Toddlers (& Mummy's)


Here another very fast recipe for Mummy’s and Toddlers. If you use a pressure cooker / steamer it is done fast & easy, with almost no loss of vitamins and… yummy!!

 The ingredients I used were:

Only the best from our Cottagegarden
1 Onion
1 Spoon Rapeseed Oil (very rich in Omega 3+6)

300g Carrots
300g Parsnips
100g Beans
100g Peas

(All ingredients are indefinite amounts really – I had the vegetables frozen from our summer Cottage garden and used a good handful of each)

A bit of rice
A little bit of cooked Turkey breast
Grated cheese (Gouda or Parmesan or… whatever you have handy)

First I chopped the onion into little bits and fried them in a bit of Oil.


Then I added the frozen vegetables, put the lid on my pressure cooker and cooked it for roughly 8 Minutes. Once the lid can be opened again, add the turkey breast and the cheese.


Blend it with the Mixer so that the consistency is a bit softer but just so that you still have some chunky bits left. Depending on the age of your Toddler and depending how many teeth are already there :)

I added Rice to it which I had left over from the day before (you can also add noodles if you have them handy)


Rice = cold / vegetable-turkey-mix = hot -> stirred together it is a perfectly warm meal – not too hot or too cold, ready to eat for little hungry bears :)


Monday 27 February 2012

My favourite recipe: cabbage-noodles (Krautfleckl)


I was in the mood for something a bit spicier this winter day and remembered a recipe my Granny always made.

As the slugs didn’t leave me any cabbage at all this year I had to buy a cabbage in order to fulfil my longing for this recipe.


The ingredients are as follows:
The noodle-dough

For the home-made noodles
4 Eggs
400g Flour

1 pinch Salt
A bit of water

For the cabbage-mix
1 spoon Butter
1 little white cabbage
2 thick slices of jerky
a bit of caraway seed

a bit Salt + Pepper
  
very handy device...
.... for making German noodles
Stir all ingredients for the noodle dough until the dough has a thick consistency. It should not be too runny anymore however you should be able to stir it still by hand.
If the dough is too hard – simply add water, if it is too watery – simply add a bit more flour.

Bring some water to boil, add a teaspoon of salt, as you would when cooking noodles.


Add the dough into the boiling water by either using a German handy device or simply by scooping little bits of the dough into the boiling water, using a spoon. This will give the noodles a bit more of a chunky feel to it.


Let the noodles simmer for about 5 Minutes in the boiling water, then remove them into a sieve and repeat the scooping procedure until the dough is gone. 


Melt the butter in a high pot, add the jerky and the caraway seed and fry until the meat is crisp. 


Meanwhile: cut the cabbage into fine slices and then add into the pot. Keep frying on a little flame until the cabbage has gone soft and looks “glassy”.

A tasty meal for big eaters...

... and little ones :)


Add the noodles and fry for further 5 - 10 Minutes.

 
Season with Salt & Pepper - ready!

Wednesday 8 February 2012

Pat's spiced Wintercake


Yesterday I stumbled across some dried Plums and as my sweet tooth was kicking in, I decided to make a cake. I changed an old family recipe of my Mum which was initially a Cherry-Cake.

Again it’s a fast and easy recipe, quick to do and just good soul food for those cold winter days out there.

The ingredients I used were:

125g Butter
200g Sugar
3 Eggs
100g Flour
1/2 Packet Baking Powder
100g ground Almonds
1Spoon Vanilla sugar
a few dried Plums (about 10)
1 Apple
1teaspoon Cinnamon
1teaspoon ground cloves
3Spoons real Cacao

Totally easy if you have a kitchen machine: simply add all the ingredients into the bowl and stir until everything is soft and dissolved. Cut the dried plums into little bits and add them to the dough.
Peel the apple, cut into little cubes and also add to the dough.
Grease a round cake form, cover with breadcrumbs (or flour) and simple fill in the dough.
Bake for about 50 Minutes at 180°C – ready!

Its so easy and so goooood!

 Have a slice with a hot chocolate (and whipped cream on top) or with your coffee, put your feet up and watch the snowflakes – or the rain, depending on where in the world you are ;)

Friday 20 January 2012

Bailey’s Cheesecake


For my birthday I took a great risk in converting my earlier featured recipe of the Irish Strawberry Cheesecake into a Bailey’s Cheesecake – hoping it would turn out well because I didn’t had any other desserts.

For this recipe I used:

About 250g Cookies (I used very light Tea Biscuits)
80g Butter
3 Spoons of Nutella
500g Greek yoghurt
150g Cream
3 shot glasses of Bailey’s
100g Sugar
1 Pack of the grounded Gelatine

Crush the cookies in a plastic bag. This is best done with a Rolling pin.

Meanwhile melt the butter with the Nutella in a little pan until everything has melted together.

Mix the cookie crumbs and the liquefied butter/Nutella thoroughly stomp the mix into a spring pan. Make sure the base is nice and tight squashed together.

Put the base into the fridge.


Mix the Yoghurt, Sugar, Baileys and Cream until the Sugar has dissolved.

Pour a little bit of hot water into a bowl, add the grounded Gelatine and whisk sturdy until the Gelatine has dissolved fully. It is important to stir until the Gelatine has cooled down or you will have lumps.

Get the spring pan out of the fridge and pour the topping onto the base. Put it all back into the fridge and wait until hardened.

My Tip: Don’t use too much Gelatine! I wanted to make super sure that the Cheese part is not too runny and used 2 packs of grounded Gelatine – the topping was way too rubbery and reminded me of a massive Bailey’s Gummibear… (not that I ever had one…..)


You can then decorate the cheesecake as you wish – with chocolate or anything else you can think of. Enjoy....

Tuesday 17 January 2012

Bananacake / Bananabread

Today I had to get rid of my Bananas. I don’t know how you feel about this but if they are too yellow or already have brown spots I simply cannot eat them.

I like them when they are a bright yellow with maybe a hint of green, then they taste the fruitiest I think.
Not too green of course or you get that weird furry sensation on your tongue.

So today it was time again for the - in my opinion - easiest cake recipe in the world:

Simply throw it all into your kitchen machine, into a cake form – bake- ready.

Ingredients:
150g Butter
3 Eggs
200g Sugar
2 spoons Vanillasugar
125 ground Hazelnuts (if you don’t have any handy you can also use chopped Walnuts or any other nuts. If you have a nut allergy, maybe you can use coconut or simply leave them out)
250g flour
2 spoons Baking powder
3 Bananas

My Tip: if you wish you can add little chocolate-bits to the dough. Dark Chocolate works best.


Mash the bananas slightly with a fork and add all the other ingredients into a bowl while mixing with a mixer. How handy is a proper kitchenmachine:
it is doing the job for you and you simply have to measure & add the ingredients and can in the meantime also entertain your Toddler. Fantastic!

Grease a loaf tin form and cover with breadcrumbs or flour.

Add the dough and bake for ca. 50 minutes at 180°C in a fan oven.
Finished – it can’t get any easier!

If you wish you can melt white chocolate and cover the cake with it – once cooled and put on a plate. It looks just lovely when the chocolate even runs down at the sides a little bit.

I personally love my Banana cake just plain and simple with eventually Chocó inside but not on the outside.

Only since I am here in Ireland I know that my Banana cake is here called Bananabread.

I tasted this kind of “bread” at an office occasion once and was a bit sceptical. I simply thought it is the typical Irish Soda Bread with some Banana in it or so….. different countries have different tastes....

How relieved was I when I figured out it is simply just what I know as MY banana cake :)


Total Pageviews